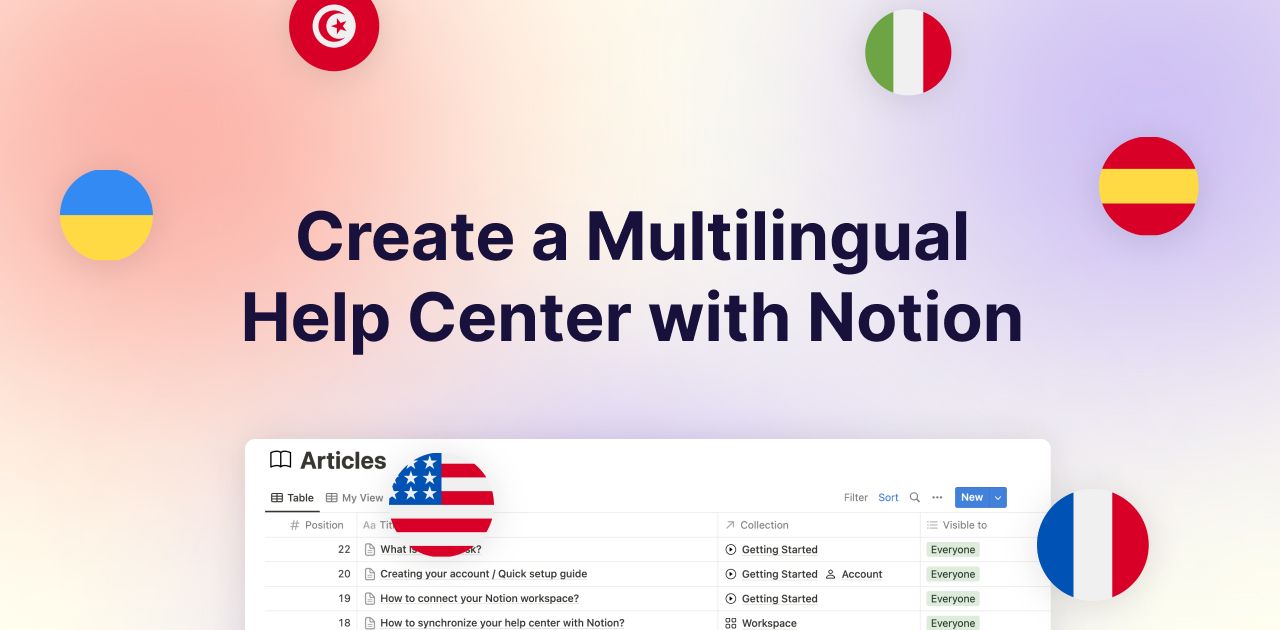
Whether you're looking to expand your reach, enhance user experience, or boost your SEO, offering support in multiple languages can set your brand apart! This guide will walk you through the process of setting up a comprehensive, multilingual help center using Notion.
Table of contents
Why create a multi-language help center?
Let's explore the reasons why you should consider making your help center multilingual.
Broader audience reach
Expanding your help center to accommodate multiple languages can significantly extend your reach. This not only attracts a wider global audience but also fosters a stronger connection with users by catering to their specific language needs, thus opening up new markets and opportunities for growth.
SEO advantages
Search engines reward websites that cater to a diverse user base. By offering multilingual support, your site becomes more visible to a global audience, improving your SEO rankings and driving more organic traffic your way.
This strategy ensures your content resonates with users across different regions, enhancing your online presence.
Enhanced user experience
Providing support in a customer's native language elevates their experience, leading to higher satisfaction levels. It demonstrates your commitment to their needs and comfort, encouraging loyalty and positive feedback.
Competitive edge
In a crowded market, offering multilingual support can set you apart from competitors. It shows a dedication to customer service and an understanding of global market dynamics. This can be a key differentiator, attracting users who value accessibility and inclusivity.
Creating a multilingual help center with notiondesk
Step 1: Sign up and connect to Notion
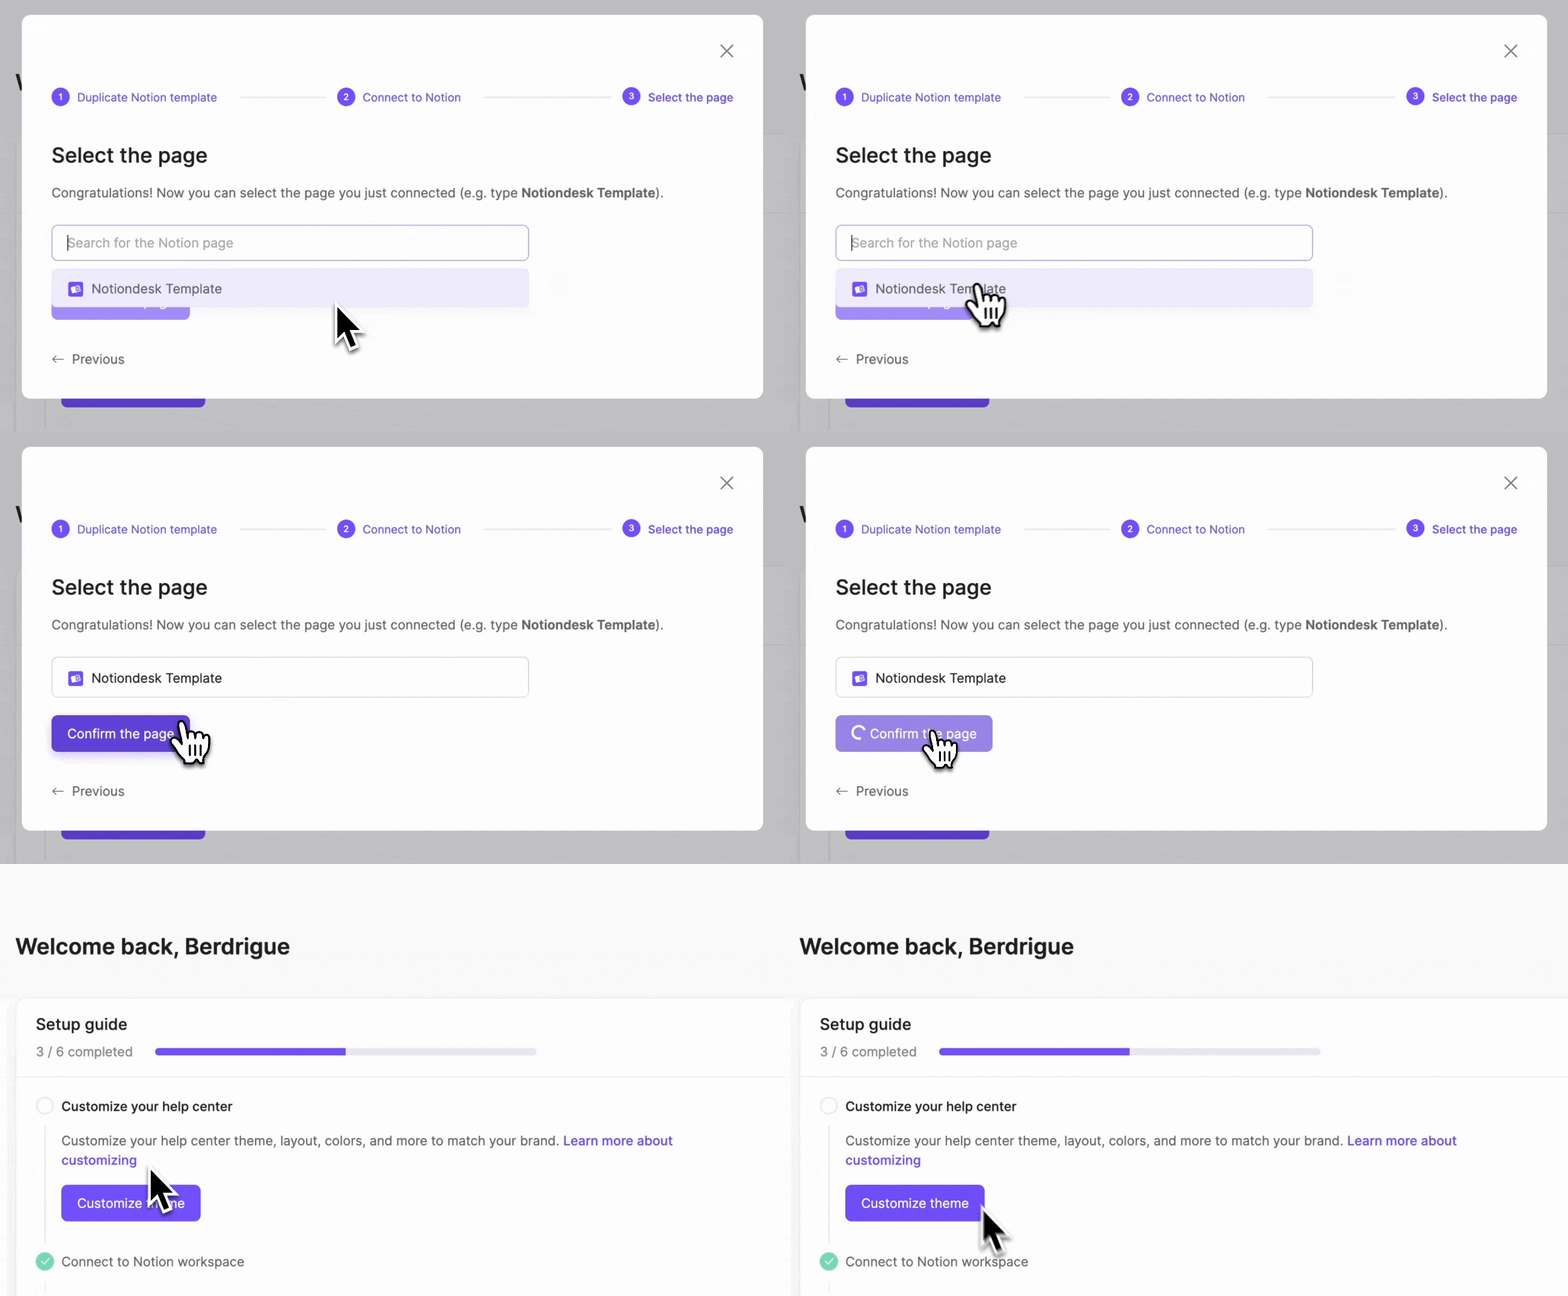
First, sign up for a Notiondesk account. Once registered, you can connect your Notion workspace to Notiondesk:
Click on "Connect to Notion" in your dashboard.
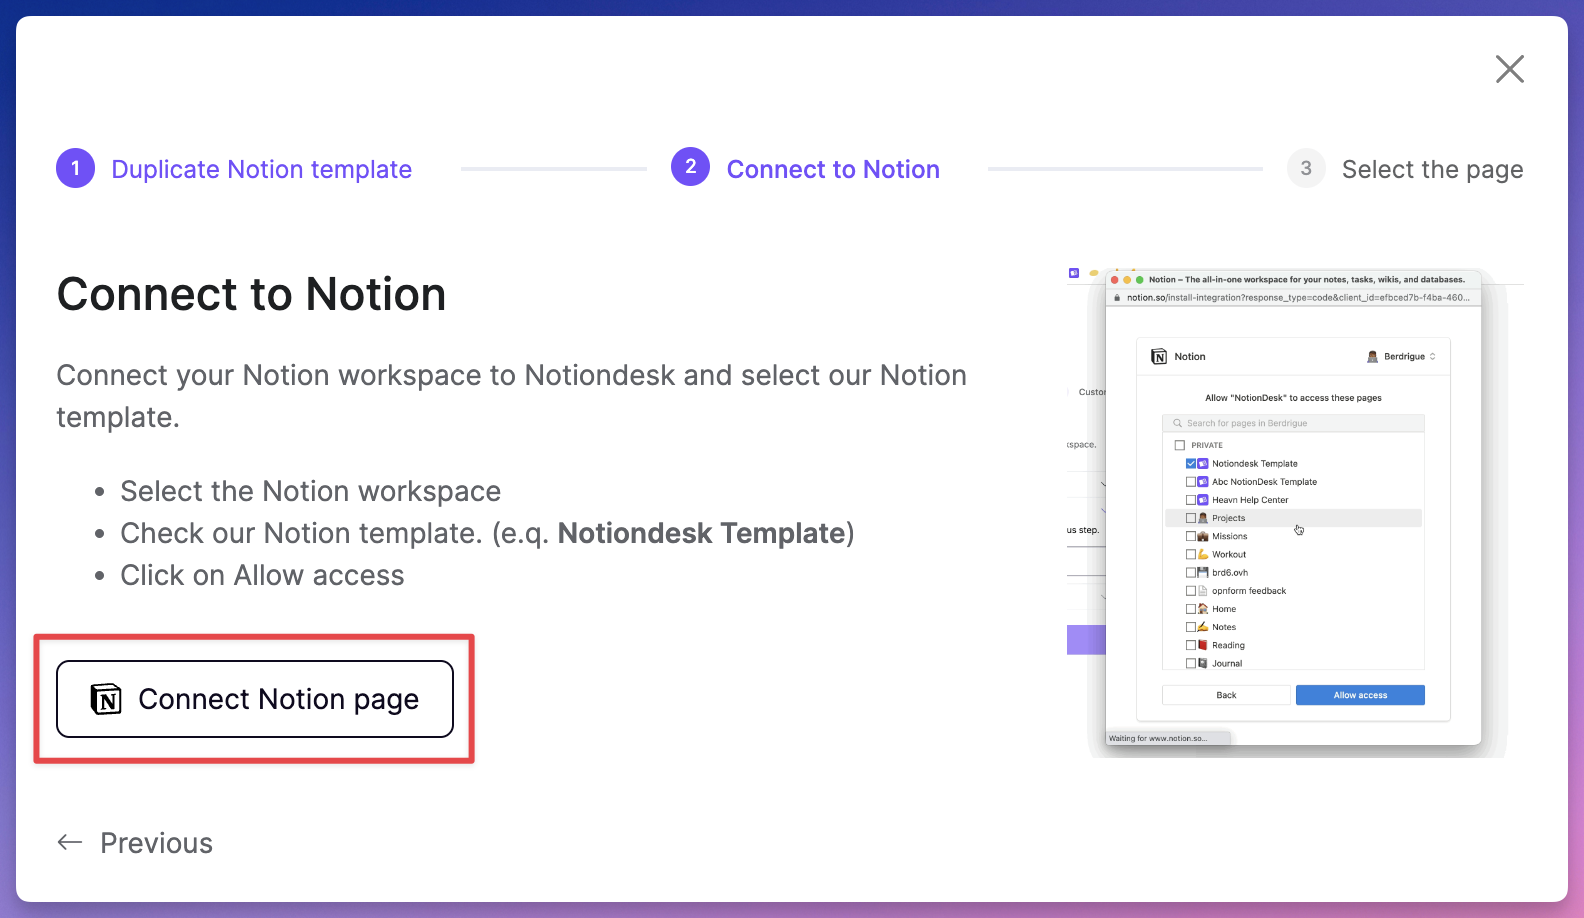
Select your Help Center page from Notion to sync. This action ensures any updates in Notion are automatically reflected in your Notiondesk Help Center.
Step 2: Set up supported languages
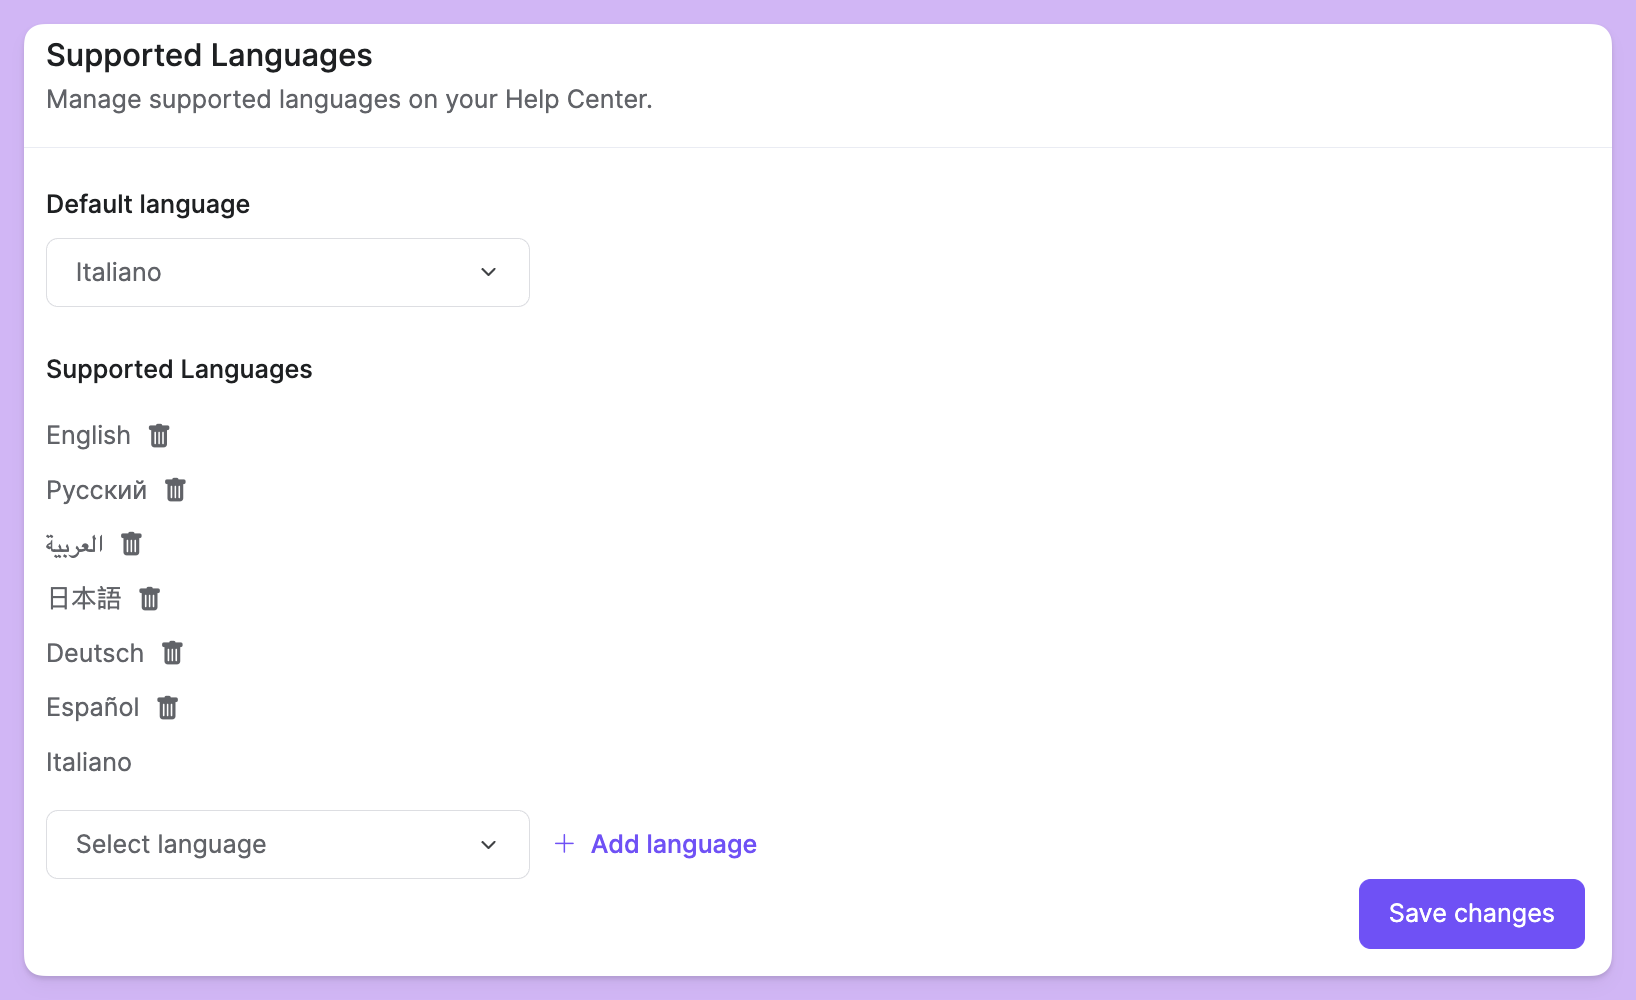
In your Notiondesk dashboard, under Settings > General, you'll find the Supported Languages section. Here, add all the languages your help center supports!
Step 3: Write and sync articles
With your languages set, it's time to populate your help center with content!
Go to the Notion template and find the "Articles" database.
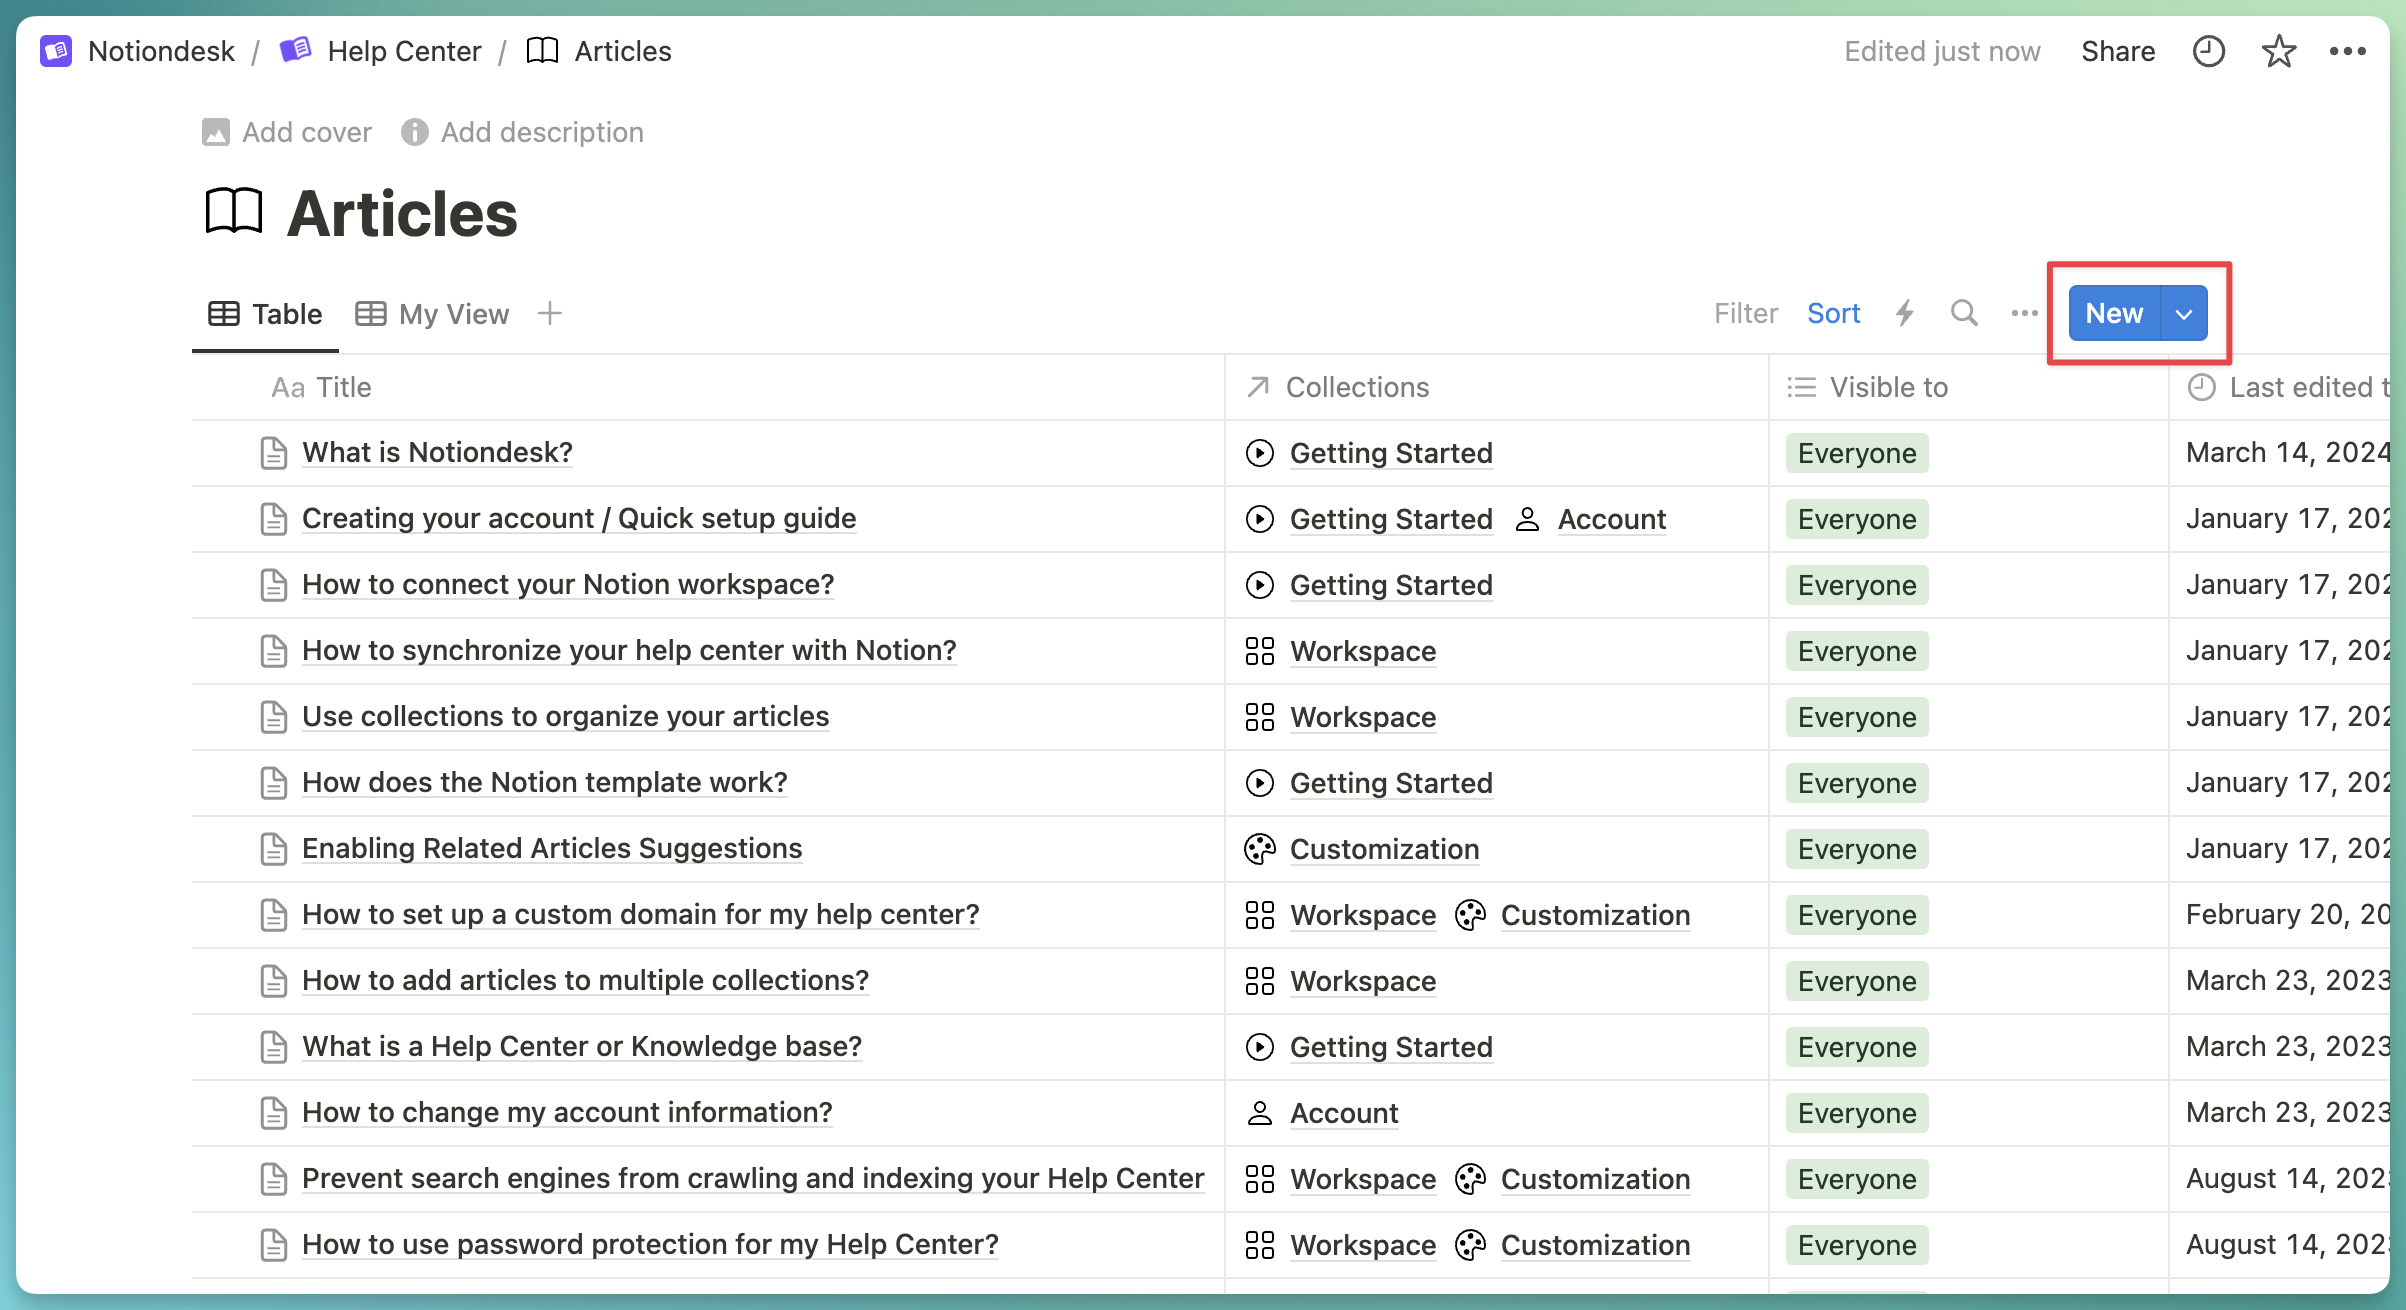
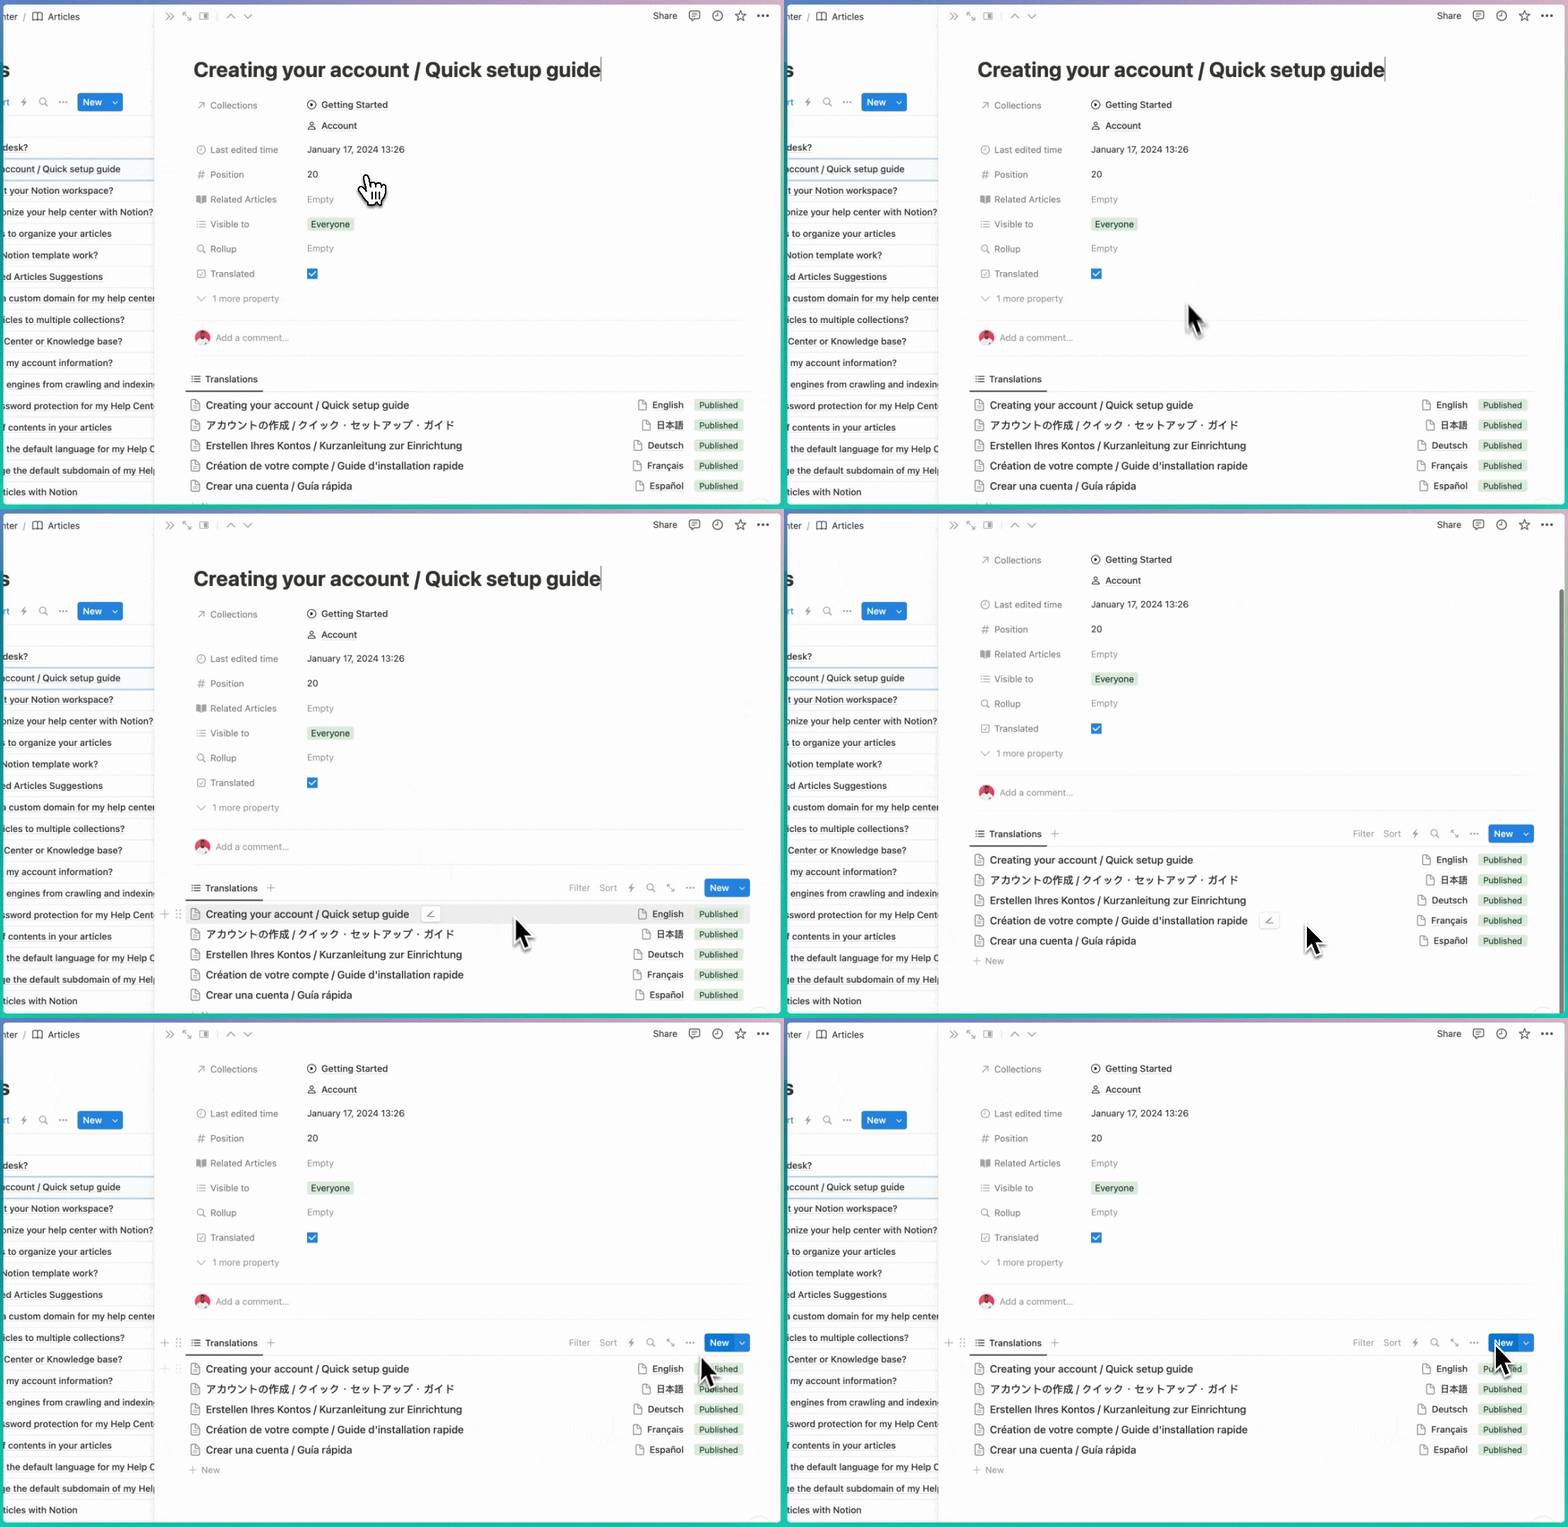
To create a new article, click on "New." Here, you'll have the option to add translations for each language. Compose the content for your article in your help center languages.
SEO optimization
In your Notiondesk dashboard, you can enhance your help center's SEO by adding relevant metadata, including page titles and descriptions.
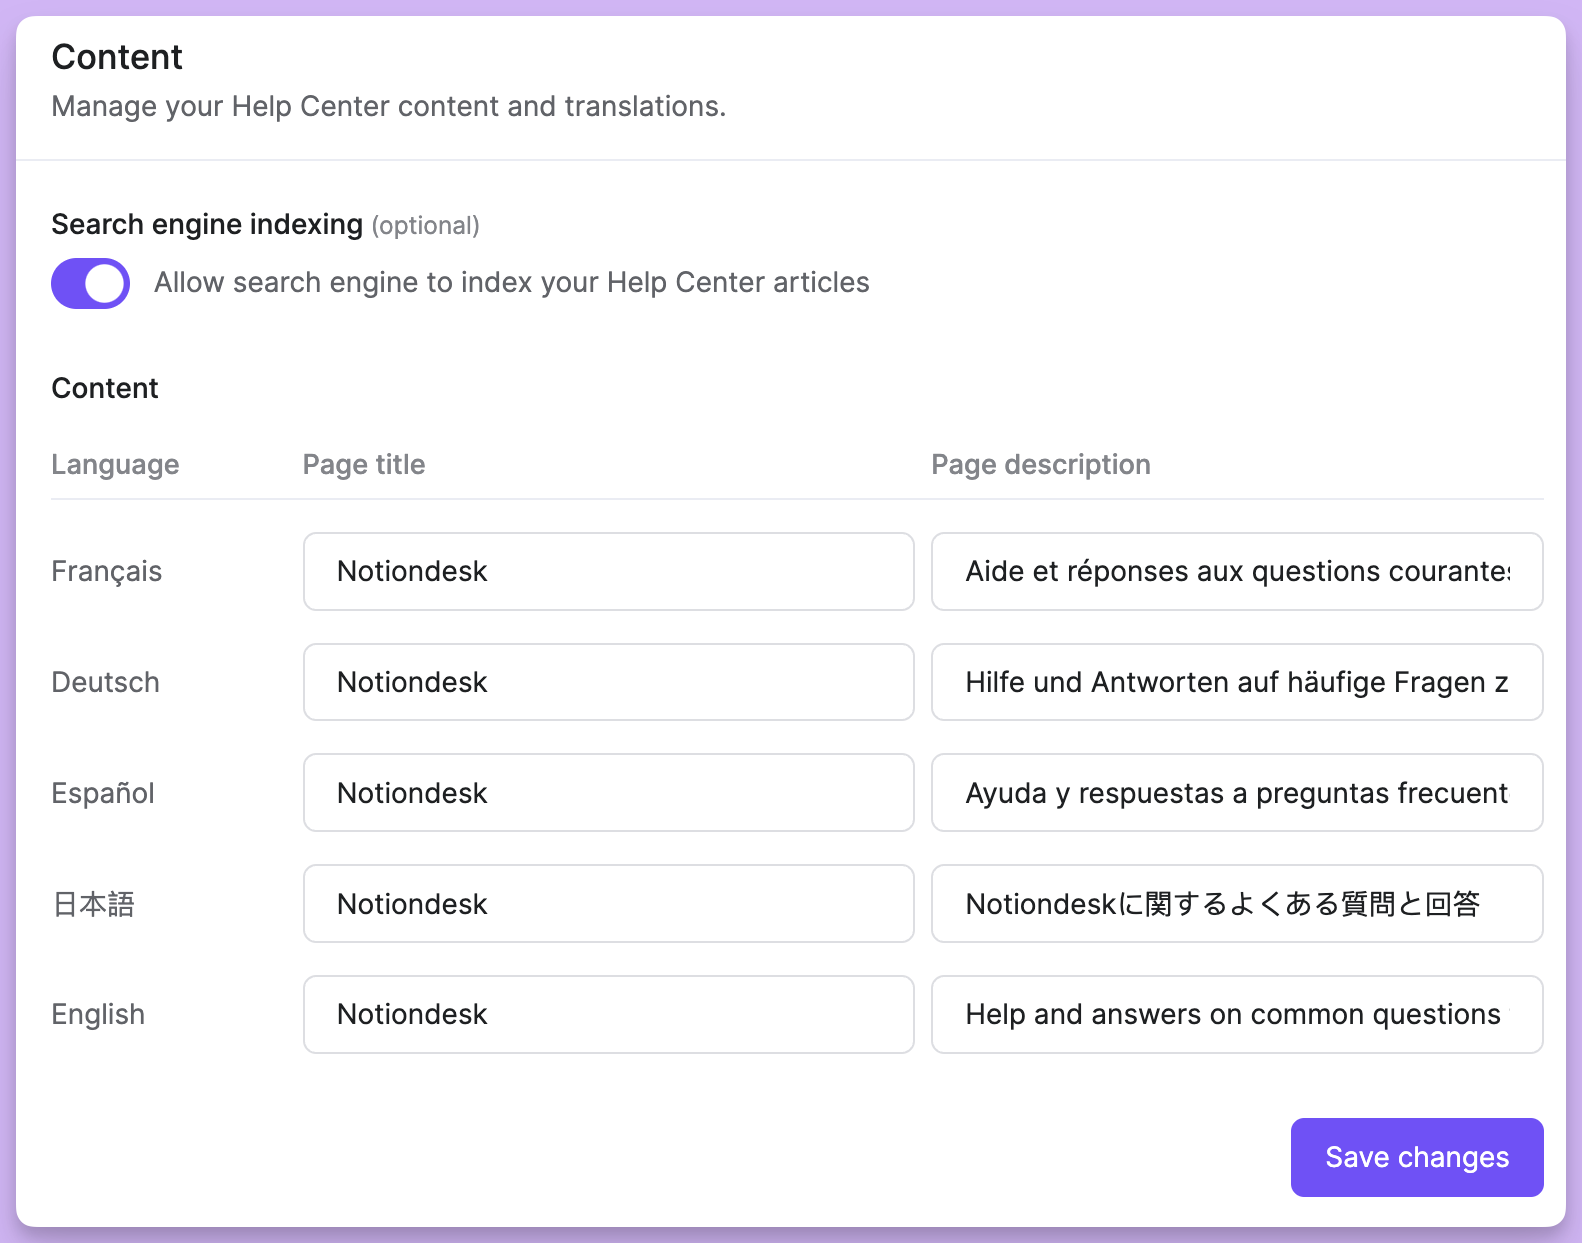
This optimization helps search engines understand and rank your content effectively, increasing your visibility.
Conclusion
Creating a multilingual help center with Notiondesk not only opens your content to a global audience but also simplifies the process. By following the steps outlined, you’ll enhance your help center's reach, user experience, and SEO.
Start building your multilingual help center today to connect with users worldwide in their own language.
